
Written by Microscopehunt Authority
The realm of scientific exploration and discovery has seen few instruments wield as much influence as the light microscope. The light microscope enabled both scientists and students to explore the concealed realms of cells and bacteria from basic biology classrooms to sophisticated research laboratories. The exploration of microscopic life forms by scientists depends on the intricate capabilities and accuracy offered by light microscopes.
This guide presents an introduction to the light microscope while detailing its operational principles and component parts alongside its applications and scientific significance. This blog serves as the ultimate entry resource for students, teachers, researchers, and hobbyists to begin their exploration of one of science’s fundamental tools.
What is a Light Microscope
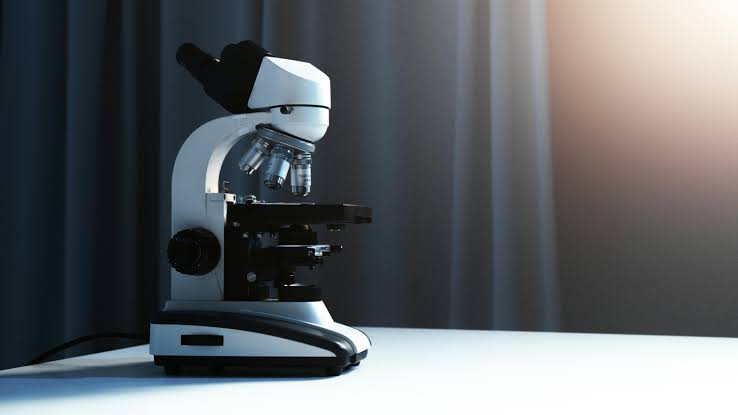
A light microscope uses visible light and multiple glass lenses to enlarge the appearance of tiny objects. It serves as a means for viewing things like cells, tissues, microorganisms, and other small objects not visible to the unaided eye in biology, medicine, and materials science .
The light microscope has been in use for over 400 years since the late 1500’s when the light microscope became a pivotal scientific tool. The fundamental concept of “magnifying and resolving fine details by means of light and lenses” is the same, although modern iterations have advanced greatly since.
Basic Operation of the Light Microscope

Light microscope works on a very simple principle: light is transmitted through the specimen and magnified using convex lenses. A description of its working follows:
- Directed light lights up the specimen placed on glass slides.
- This light travels through a sequence of lenses:
- First, through the objective lens, which magnifies the image.
- Then through the eyepiece, which further magnifies the image and is used for viewing.
- The user views an enlarged, upright image through the eyepiece.
Magnification by the light microscope generally ranges from about 40 to about 1000, making it ideal for viewing single cells, bacteria, and thin slices of tissues.
Types of Light Microscopes
There exist different varieties of a light microscope, depending on the observations one wishes to make:
- Compound Light Microscope
It is the most widely used microscope in educational and laboratory settings.
It uses intense light to activate fluorescent dyes within the specimen.
Looks at thin specimens on glass slides. - Stereo Microscope (Dissecting Microscope)
Gives a 3D view of larger objects at lower magnifications.
Useful for dissections or looking at circuit boards or for jewelry work. - Fluorescence Microscope
It uses intense light to activate fluorescent dyes within the specimen.
Ideal for examining particular proteins or cellular structures. - Phase-Contrast Microscope
Enhances contrast in clear specimens without requiring any staining.
Widely used in cell biology and microbiology.
The Different Components of a Light Microscope and How They Are Used
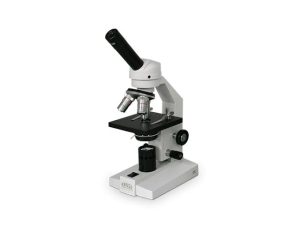
Understanding the different parts of a light microscope helps in using and maintaining it effectively. Below are the key components:
- Eyepiece (Ocular Lens)
The lens you look through.
Usually provides 10x magnification. - Objective Lenses
Attached to the rotating nosepiece.
Common magnifications: 4x, 10x, 40x, and 100x (oil immersion). - Stage
A flat surface that holds the specimen slide in position.
Typically features clips or a mechanical stage to hold the slide in place. - Condenser
Located below the stage.
Focuses light onto the specimen. - Diaphragm (Iris)
Regulates the brightness and diameter of the light beam.
Improves image contrast and clarity. - Light Source
Usually an LED or halogen bulb.
Can be built-in or use a mirror to reflect external light. - Coarse Adjustment Knob
Moves the stage up or down quickly.
Used for rough focusing. - Fine Adjustment Knob
Used for precise focusing at higher magnifications. - Arm and Base
Provide structural support and stability
How to Use a Light Microscope: Step-by-Step
- Proper use of a light microscope results in clearer images and ensures the device remains in good condition.
- Begin by placing the microscope on a stable surface and turning on the light source.
- Once prepared, carefully position the slide with the specimen and cover slip under the objective lens.
- Secure the slide to the stage using clips.
- Begin with the lowest power objective lens, 4x or 10x and use the coarse adjustment knob to achieve focus.
- If necessary, change to a higher magnification.
- Turn the fine adjustment knob until the image is clear.
- Adjust the diaphragm to achieve the best contrast.
- Make note of observations or photograph, as appropriate if you are using a camera adapter.
Advantages of a Light Microscope
- Live specimens observed in real time.
- They are affordable and simple to operate.
- Higher magnification for cellular and tissue studies.
- Lightweight and low maintenance.
- Another approach involves integrating digital cameras with recording and teaching.
Limitations of a Light Microscope
Despite its many benefits, the light microscope also has a few limitations
- Resolution is lower than electron microscopes.
- Cannot see structures smaller that 200 nano meters, like viruses.
- Needs thin sections to be properly observed.
- Staining can occur, which destroys living specimens.
Applications of the Light Microscope
The light microscope has applications in all fields. It is most commonly used in areas such as:
- Biology and Medicine – Cell, bacteria, and tissue sections studies. Disease diagnosis from blood or tissue samples. Watching mitosis, meiosis and other cellular events.
- Education – An integral component of lab work at schools and universities. Teaches students to be observant of microscopic organisms and how to analyze them.
- Botany – Study of plant tissues, stomata, root tips, chloroplasts, etc. Plant structure and function.
- Pharmaceutical Research – Responses of cells to drugs. Drug testing on tissues, at the cellular level.
- Environmental Science – Examining water or soil samples for microorganisms. Pollution or biodiversity assessment in ecosystems.
- Microbiology – Identification of bacteria & other microbes. Cultures and antibiotic resistance testing.
The Evolution of the Light Microscope
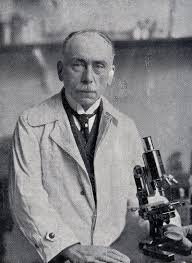
History of the Light Microscope The light microscope has a history dating back to the late 1500’s. While early models were just magnifying glasses, the first known use of the microscope was in the 17 century by Antonie van Leeuwenhoek, who utilized a homemade microscope to be the first to view bacteria and protozoa.
Modern light microscopes are much more sophisticated. Among these are digital cameras and computer interfaces, and even software for 3D rendering and measurement. Light microscopy is now a more powerful and accessible technique than it has ever been.
Tips for Maintaining Your Light Microscope
Light Microscope Maintenance Tips Caring for your light microscope will help it to last and perform well.
- Only clean the lenses with lens paper; do not clean them with tissues or fabric.
- Turn off the light when not in use so that you don’t burn out the bulb.
- When not in use, cover the microscope to avoid dust accumulation.
- Keep in a dry, stable environment, to prevent mold and corrosion.
- Do not force knobs or other moving parts; handle gently.
Light Microscope vs. Electron Microscope
| Feature | Light Microscope | Electron Microscope |
|---|---|---|
| Light Source | Visible light | Electron beam |
| Magnification Range | Up to ~1000x | Up to ~2,000,000x |
| Resolution | ~200 nanometers | ~0.1 nanometers |
| Can View Live Specimens? | Yes | No |
| Cost | Affordable | Extremely expensive |
| Use in Education | Common | Rare |
While electron microscopes offer much greater magnification and resolution, the light microscope remains the most accessible and widely used microscope for routine observation and teaching.
Conclusion
The light microscope is a laboratory instrument, as well as “a doorway to discovery”. The insight it provides into the microscopic architecture of living things has transformed biology, medicine and a myriad of other fields. From the first inventory of cells produced by your research to the most advanced work, the light microscope remains a vehicle for science. Armed with this guide you now are ready to understand, use, and appreciate the amazing capabilities of the light microscope.